Wetroom installation can seem complex. There are many different elements to consider when specifying a wetroom, and it’s absolutely crucial that installation is done properly to ensure optimum longevity and functionality.
At CCL Wetrooms we’re experts in wet room design and installation with over 30 years of experience in the waterproofing industry. We offer a range of comprehensive design and specification services to help architects build contemporary, state of the art wet rooms that not only look stunning, but perform beautifully.
So if you have a wetroom project coming up, we’ve broken our checklist down into three key areas that will need to be considered when specifying a wet room:
1. Drainage
Drainage is one of the most important aspects of wetroom design, and it’s very important to specify the type of solution you want to install at the beginning of the project.
Things to consider when identifying a suitable wet room drainage solution:
- The type of floor build up – timber or solid.
- The flow rate required – will you need more than one trap to cope with higher flow rates?
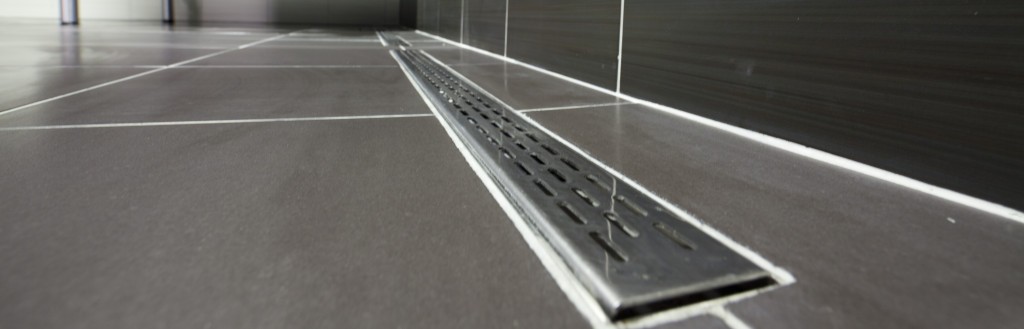
- The type of grill you would like to use – linear or square? (This will depend primarily on the look that the client would like to achieve).
- Where the grill will be positioned in the wetroom – ie up against the wall or in the middle of the shower area?
- The style of tiles to be installed – mosaic or contemporary large format tiles, natural stone or ceramic?
2. Floor Build Up & Gradient
Floor Build Up
It is important to establish the type of floor that your wetroom will be built upon, as this will determine the most suitable drainage options and enable you to prepare the floor prior to installation. Wetrooms can be installed on both timber and solid floors, with both substrates needing to be prepped in specific ways to ensure the right gradient (fall) is created to direct water towards the drain. This may involve several structural modifications, for which CCL Wetrooms can offer on-site support.
Floor build up considerations when installing a wet room:
- Timber floors require the installation of a floor former or ‘dec’ before drainage and waterproofing systems are fitted.
- Solid floors in new builds require drainage systems to be installed before the screed is laid.
- Solid floors in older builds will need to have the old screed removed in the designated shower area before a drainage system can be installed – followed by a new screed.
- At this stage, underfloor heating will need to be installed if it’s part of the wet room design.
- Keep in mind the Building Regulations for bathrooms when making structural modifications to install a wetroom.
Floor Gradient
A significant part of wetroom specification is creating the floor gradient in the showering area.
For this part of the planning and specification process, you will need to think about:
- The type of floor the wetroom is being installed on.
- For timber floors, a preformed floor former or ‘dec’ provides a guaranteed gradient and these are usually 22mm thick to match a standard floorboard. A wide range of sizes are available.
- A section of the floorboards is removed and a ply base support should be fitted prior to the installation of the ‘dec’. Once the waste pipe and trap have been fitted, the ‘dec’ is installed, giving a flush transition to the remaining floor level.
- For solid floors, the drain is set into the screed in the desired position within the shower area. The depth of screed is often less than 100mm, (including the fall of the waste pipe) and a shallow trap such as the Linear Screed Drain at only 55mm, will need to be installed. The remaining shower area should then be screeded to fall.
3. Waterproofing
Another vital element of wet room design and installation is waterproofing. This typically involves the use of an impermeable membrane under the tiles and across the whole of the shower area, providinga protective, waterproof layer that keeps out water.
What to consider when specifying the waterproofing solution for a wet room:
- The type of waterproofing solution that will be used. At CCL Wetrooms we provide various tanking systems that are suitable for solid and timber floors and walls.
- How long the product needs to dry and set properly before tiles are installed. The Tilesure membrane is quick and easy to apply and can be tiled upon immediately.
- FWM (Flexible Wall Membrane) is a flexible coating for waterproofing wall surfaces before the walls are tiled. It is quick to apply, but must be left for 24 hours before tiling.
- The waterproofing solution must be installed across the entire shower area, and at least 1 metre beyond this.
- Critical to any wetroom are the wall/floor junctions and the area around the drain which is why we recommend a self-adhesive membrane (Tilesure) on the floor overlapped with a liquid membrane on the walls
Other factors to be considered.

4. Tiling
If you are planning to tile your wet room, you will need to think carefully about the size and material of tiles that will be most appropriate for your finished design. Things to consider include:
- The type of floor the tiles are being installed on.
- The type of wet room drainage system being used.
- Will non-slip tiles be required to enhance safety in the showering area?
- Adhering to The British Standard BS5385 for the installation of ceramic floor tiles – e.g. tiles MUST be on a 100% bed of adhesive.
For more information on how to specify and install a high quality wetroom that stands the test of time, take a look at our Wet Room Construction Details Page.