How to Build a Wet Room
Building a wet room can be more complex than renovating or building a standard bathroom. Wet rooms have a number of crucial elements that need to be factored into their construction to ensure they not only look good, but function efficiently and most importantly, do not leak.
Read on to find out the aspects of wet room construction that should be considered when planning an installation.
Wet Room Construction: 4 Things to Consider
From deciding on where to build the wet room, to understanding the implications of flooring type, there are many aspects to consider when constructing a wet room.
1) Wet Room Location
Where to place a wet room in a new build is an important consideration of planning and design. Wet rooms are no longer constrained to a solid floor. They can be constructed anywhere – including onto timber floors – thanks to the advances in the design of wet room drainage and waterproofing methods. With effective waterproofing systems, a wet room can be installed throughout residential properties, including family bathrooms, bedroom en-suites and even loft conversions.
2) Build Up Process
Another factor to be considered when constructing a wet room is the floor build up. Wet rooms can be constructed on both timber and solid floors, but the method of installing the wet floor, and the elements used to create the gradients (falls) on each substrate, will vary.
3) Creating Gradients
Creating a gradient in a wet room is one of the three most important components of wet room construction, and is vital in order to guide water down the drain efficiently. The minimum recommended fall is 12mm, and the slope needs to be formed into the floor itself.
There are several ways of doing this depending on the flooring type you are working with.
4) The Differences Between Wooden and Solid Floors
The type of flooring beneath it will have a significant impact on how to build a wet room. Read on to discover the differences between wet room construction on a wooden floor, compared to a solid floor.
How To Build A Wet Room On A Wooden Floor
Wet room wooden floor build up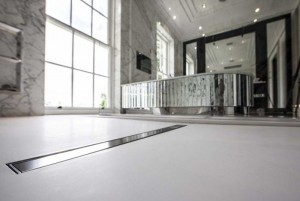
Timber floor wet room installation will require the removal of the floorboards before anything else is installed. Following its removal, a floor former or ‘dec’ can be fitted, and the drainage systems and waterproofing membranes can be installed.
Wet room wooden floor structural rigidity
Installing a wet room on an upper timber floor, or converting an upstairs bathroom into a wet room, may involve minor structural modifications. This is to ensure it is properly supported, and it is a relatively simple and straight forward process. Whilst planning permission is not necessary, wet rooms need to comply to Building Regulations for bathrooms in general.
To ensure that a wet room built on a timber floor using a floor former or ‘dec’ is structurally secure, the following should be consider:
- a subfloor within the wooden joist spaces will need to be constructed using plywood
- A minimum of 18mm ply should be installed between the joists, finishing flush with the top of the joists
- the 22mm floor former should then be installed above the ply lining
- the whole area must be waterproofed
By following these steps, you will ensure that the wet room is structurally sound.
Wet room wooden floor gradients
The floorboards will need to be taken up, supported with ply lining and a floor former with built-in gradients installed. The floor formers are lightweight but they are efficiently designed to carry the weight of the tiles. They have one or two way falls built in, which slope to a linear drain positioned in the floor, or next to the wall. A four-way fall can be achieved with the use of a square drain, offset or in the centre of the former.
See Our Wet Room Drainage Systems for Timber Floors
Installing A Wet Room On A Solid Floor
Wet room solid floor build up
In a new wet room
In a new build, the wet room drainage systems are installed into the floor prior to the screed being laid. This is to create the required gradient needed for the wet room floor.
In a renovated wet room
A retro-fit wet room will require the old screed to be removed in the designated shower area to allow the new drainage system and screed to be installed with the required drainage falls. It is also possible to remove the screed within the shower area to allow the drainage outlet to be fitted, self-levelling latex to be poured, and a floor former installed on top. This will form the wet room gradient.
Wet room solid floor gradients
A new concrete floor can be laid to fall, which allows for the height of the drain. If the wet room is being installed retrospectively, the existing floor will need to be broken into, in order to install the drainage systems.
See Our Wet room Drainage Systems for Solid & Concrete Floors
Drainage & Waterproofing – All Flooring Types
Drainage grill aesthetics in a wet room
It’s advisable to establish the style of wet room drain required at the beginning of the project. This will help determine which system should be installed. Taking into account the desired position of the grill within the shower area will also narrow down the options that are available.
The two main styles of drainage grills are:
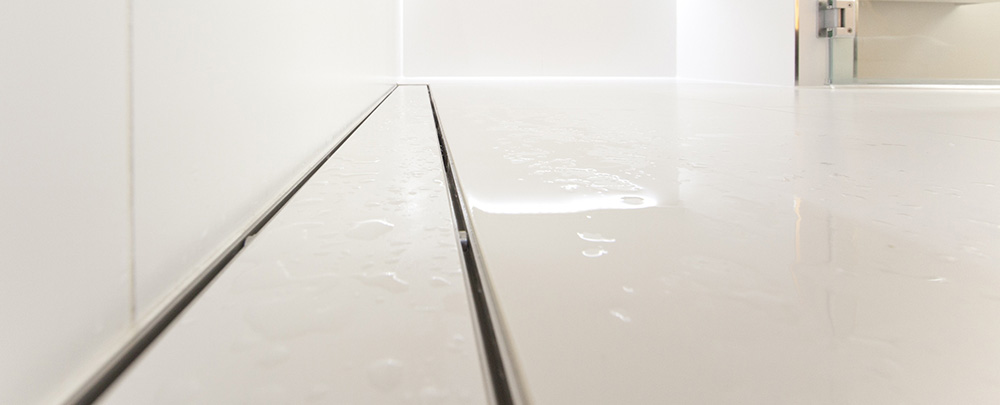
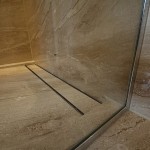
Linear grill
This is a contemporary rectangular grill that can be positioned anywhere within the shower area, including up against the wall. The grill comes in different styles:
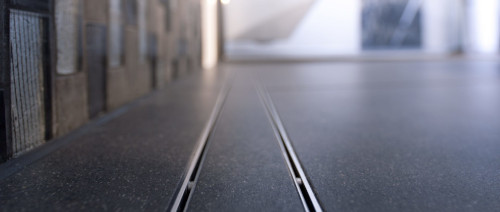
- stainless steel (available in a variety of finishes)
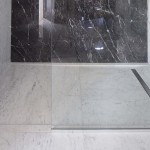
- Stone-Infill Grill – which is inlaid with your chosen tile to co-ordinate with the wet room
The linear grill can be used on timber or solid floors and is ideally suited to contemporary large format tiles.
Square grill
This is a traditional square drain that is best suited to wet rooms on a timber floor construction. The drain is ideal for use with mosaic tiles.
-
- Linear Floor Grill against the wall
-
- Stainless steel Linear Floor Grill
-
- Stone-Infill Grill against the wall
-
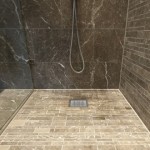
- Slotted stainless steel square grill
-
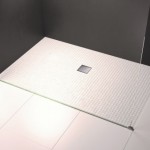
- Solid stainless steel square grill
-

- Stone-infill grill
Explore Our Wetroom Drainage Products
Discover CCL Wetrooms' range of wetroom drains for solid and timber floors, from our Linear Screed Drain to our Solo 4 Drain.
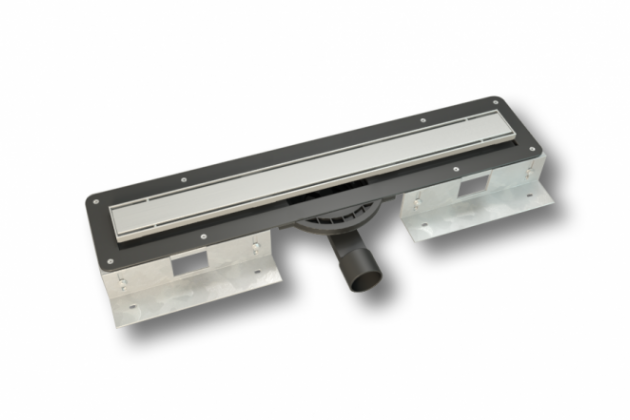 Wet Room Drainage
Drainage is a key element in the construction of a wet room and the style of drainage used will depend on the following:
- Floor build up
- Flow rate of the shower* (litres per minute, l/m)
- Style of drainage grill
- Type of tiles required
All wet room drains contain a trap and a vertical or horizontal waste pipe attachment. It’s important to choose one that will cope with your water pressure and the desired flow rate for the shower. Once the drain is installed and the waste pipe has been connected to the soil pipe, the floor former is fitted on top before being sealed and waterproofed.
* The l/m is determined by the type/style of shower head chosen and your water pressure. It is vital to ensure that the correct number of traps have been installed at this stage to cope with the flow rate (l/m), as additional traps cannot be added later.
Please remember that other sanitary-ware products in the bathroom do not share the wet room waste pipe. Always ensure that the wet room waste pipe runs independently into the soil pipe.
At CCL Wetrooms we’re experts in wet room drainage. We offer a range of innovative drainage systems, such as our market leading shallow linear screed drain. Take a look at our products page for more information.
 Waterproofing
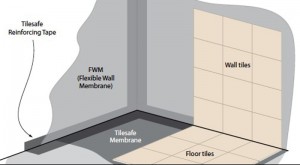
Waterproofing, also known as ‘tanking’ is a vital part of wet room construction and mustn’t be overlooked. It can be effectively carried out through the application of an impermeable waterproof membrane that is designed for use across the whole shower floor area prior to the application of tiles. It is recommended that the membrane is installed across the whole bathroom floor (where appropriate) or at a minimum of 1 metre beyond the shower area.
The membrane is ideal for fast track construction and can be walked on and tiled on immediately – unlike liquid membranes that have to be left for 24 hours to dry. The floor membrane should be used in conjunction with a flexible wall membrane on the walls to ensure water cannot penetrate through any gaps.
A correctly installed waterproof membrane will last for the lifetime of the tiles. Tiles should then be laid using a high quality, rapid set flexible tile adhesive on a solid bed.
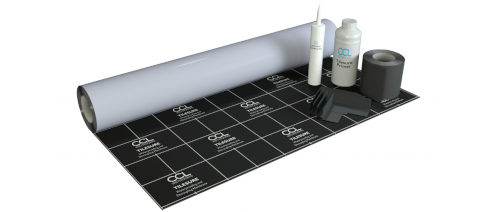
Explore Our Wetroom Waterproofing Products
Find out more about the types of waterproofing solutions that can be used in wetrooms. All of our products are expertly manufactured to ensure highly effective waterproofing.
Wet Room Tiling (to British Standard BS5385)
Tiles are one of the most popular options for wet room flooring. They look good, are easy to keep clean, and offer plenty of scope for design in a wet room.
Textured tiles can help to ensure maximum safety while using a wet room. Natural stone tiles, mosaics, sandblasted or flame finishes are good options because they provide more friction and a secure feeling underfoot.
At CCL Wetrooms, we offer a comprehensive wet room design service (and an optional installation service through our sister company Wetrooms UK) that can be tailored to your project and encompasses all stages of the build. If you’d like to find out more about how we can help you design a beautifully functional wet room, contact us today.