
A bathroom leak needs to be dealt with quickly. Even a small amount of water can travel beneath tiles, vinyl, skirting boards, shower trays or wetroom flooring, where it may cause hidden damage long after the surface looks dry.
Knowing how to dry out a bathroom floor after a leak can help reduce the risk of mould, loose flooring, damaged subfloors and more expensive repairs. The key is to stop the leak, remove standing water, ventilate the room properly and check whether moisture has reached beneath the visible floor.
In this guide, we’ll walk through the steps to take after a bathroom leak, how to dry the floor safely, waterproofing advice, and when to call in a professional.
How to Dry Out a Bathroom Floor After a Leak Safely
Drying a bathroom floor properly is about more than wiping away visible water. Bathrooms are full of edges, seals, joints and hidden layers where moisture can sit unnoticed, especially around showers, toilets, baths and wetroom drains.
Before carrying out any repairs or resealing, the floor needs to be made safe, dried thoroughly and checked for signs of hidden water damage. Follow the steps below to reduce the risk of mould, subfloor damage and repeat leaks.
Step 1: Stop the Source of the Leak
Before you start drying the bathroom floor, make sure the leak has stopped. If water is still escaping, any drying work will be temporary.
If you can see where the leak is coming from, turn off the water supply to that fixture. This may be an isolation valve near the toilet, basin, shower or bath. If you cannot find the source, turn off the mains water supply until a plumber can investigate.
Common causes of bathroom leaks include:
- leaking pipework
- loose or failed bath seals
- cracked shower trays
- damaged grout or silicone
- faulty toilet connections
- blocked or leaking waste pipes
- poor drainage in wetrooms
- failed waterproofing beneath tiles, allowing water to penetrate the structure
If water is close to sockets, underfloor heating controls, lighting or electrical appliances, avoid touching anything and turn off the power to the affected area if it is safe to do so.
Step 2: Remove Standing Water
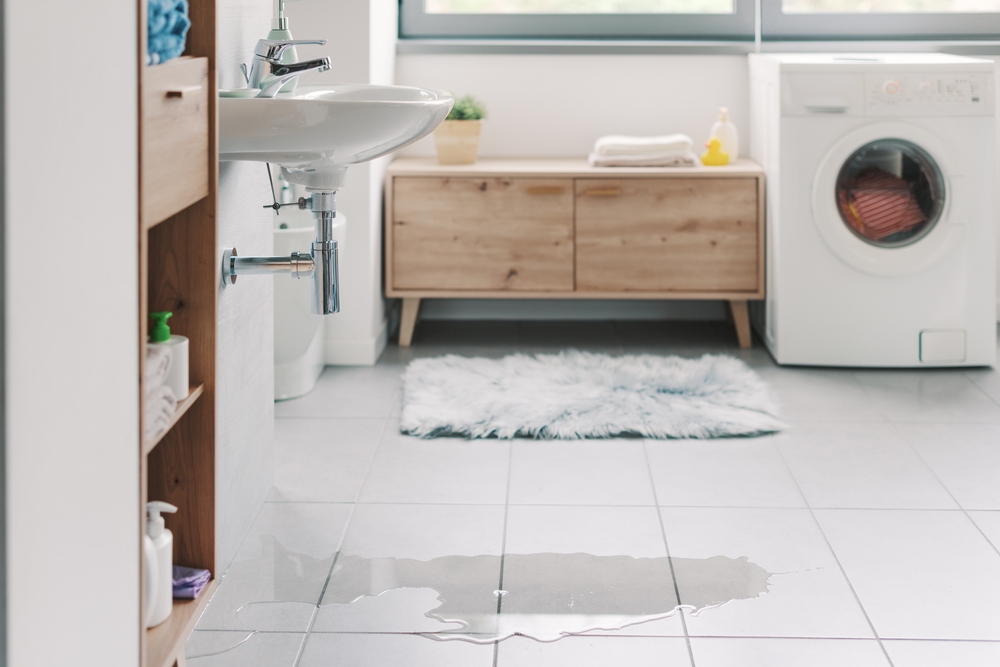
Once the leak has been stopped and the area is safe, remove as much standing water as possible. The longer water sits on the bathroom floor, the more likely it is to seep into edges, joints and hidden layers.
Use towels, a mop or a wet vacuum to lift water from the floor. Work from the wettest area outwards and pay close attention to corners, skirting boards, doorways, behind the toilet and around the shower or bath.
Remove anything that is holding moisture against the floor, such as bath mats, towels, bins, storage baskets or freestanding units. These should be dried separately before being returned to the room.
If the leak involves dirty water, sewage or waste pipe overflow, do not try to clean it up yourself. Contaminated water can be a health risk and should be handled by professionals.
Step 3: Improve Ventilation
Good ventilation is one of the most important parts of drying a bathroom floor. Bathrooms already hold a lot of moisture, so trapped damp air can slow the drying process and increase the risk of mould.
Open windows where possible and use the bathroom extractor fan to move damp air out of the room. If it is safe to do so, keep the bathroom door open to improve airflow.
If the room has poor ventilation, the floor may take much longer to dry. This is especially common in internal bathrooms with no windows, small cloakrooms, en-suites and wetrooms where water has reached corners or wall junctions.
Keep ventilation running for longer than you think you need. A floor can look dry on the surface while moisture remains beneath tiles, grout, vinyl or timber.
Step 4: Use Fans to Move Air Across the Floor
Fans can help speed up drying by moving air across the affected area. Position the fan so it blows across the floor rather than directly down onto one small patch. This helps moisture evaporate more evenly.
If you have more than one fan, use them to create airflow through the room. For example, one fan can move air across the wet area while another helps push damp air towards a window or doorway.
Avoid using fans if there is still standing water near electrics. Make sure plugs, sockets and extension leads are kept away from damp areas.
Fans are useful for surface drying, but they may not be enough if water has reached the subfloor. If the bathroom still smells damp after drying, there may be moisture trapped beneath the visible surface.
Step 5: Use a Dehumidifier
A dehumidifier can help remove moisture from the air and support the drying process. This is particularly useful in bathrooms with limited ventilation or after a larger leak.
For best results, remove standing water first, then run the dehumidifier in the affected room. Keep the door and windows closed while it is running so the unit can focus on drying the room, rather than pulling in moist air from elsewhere.
Empty the tank regularly or use a continuous drainage option if your dehumidifier has one. You may need to run it for at least 24 to 48 hours after a small leak, and longer if the room still feels damp.
A domestic dehumidifier can help with surface moisture, but it cannot always dry water trapped beneath tiles, wetroom formers, screed, timber or waterproofing layers. If the floor remains soft, uneven or musty, arrange a professional inspection.
Step 6: Dry Around Edges, Seals and Fixtures
Water rarely stays in the middle of the floor. It often travels to the edges of the room, behind fittings or into small gaps around fixtures.
Check and dry around:
- toilets
- basins
- bath panels
- shower screens
- shower trays
- wetroom drains
- skirting boards
- door thresholds
- floor-to-wall junctions
These areas are easy to miss but are often where hidden damp develops. Failed silicone, cracked grout and loose edges can allow water to reach the subfloor or wall structure.
In wetrooms, pay particular attention to the drain, floor gradient and the junction where the floor meets the wall. If water is pooling instead of draining away, there may be a problem with the fall of the floor or the drainage system.
Step 7: Check Whether Water Has Gone Beneath the Floor
Once the room has been dried, inspect the floor carefully. A bathroom floor can look dry while moisture remains underneath.
Look for warning signs such as:
- loose tiles
- hollow-sounding tiles
- cracked or crumbling grout
- lifting vinyl, LVT or laminate flooring
- soft or spongy flooring
- swollen skirting boards
- musty smells
- damp patches on the ceiling below
- mould returning after cleaning
If you notice any of these signs, water may have reached the subfloor. This is where leaks become more serious, as trapped moisture can damage timber, chipboard, screed, tile adhesive and waterproofing layers.
Do not regrout, reseal, repaint or lay new flooring over damp areas. This can trap moisture and make the damage worse.
Step 8: Prevent Mould After the Leak
Mould can develop when moisture remains in flooring, grout, walls or hidden spaces. To reduce the risk, keep drying the room even after the surface appears dry.
Continue using ventilation, fans or a dehumidifier until the room feels dry and any damp smell has gone. Wash and dry damp towels, bath mats and soft furnishings before putting them back.
Clean hard surfaces with a suitable bathroom cleaner and keep checking corners, silicone, grout lines and skirting boards over the following days. If mould appears or returns, it may be a sign that water is still trapped somewhere.
Mould that keeps coming back should not be ignored. It may point to a hidden leak, poor ventilation or damage beneath the bathroom floor.
Step 9: Know When to Call a Professional
Some bathroom leaks can be managed with fast clean-up and drying. Others need professional support, especially if water has travelled beneath the floor.
Call a professional if:
- the leak is still active
- you cannot find the source
- water has reached the ceiling below
- the floor feels soft or uneven
- tiles have lifted or cracked
- grout or silicone has failed
- there is a persistent musty smell
- mould appears after drying
- the leak is in a wetroom or shower area
- you suspect subfloor damage
- your bathroom has underfloor heating
Wetroom leaks should be checked carefully because the issue may be beneath the visible surface. Problems with tanking, drainage, falls or failed seals can allow water to escape into the floor structure, even if the room looks dry.
How Long Does a Bathroom Floor Take to Dry After a Leak?
A small surface leak may dry within 24 to 48 hours with towels, ventilation, fans and a dehumidifier. Larger leaks may take several days.
If water has reached beneath tiles, vinyl, laminate, timber, screed or wetroom flooring, it can take much longer. The surface may dry first, while the subfloor remains damp.
That is why it is important to keep checking for warning signs after the initial clean-up. If the floor still smells damp, feels soft or shows signs of movement, further drying or repair work may be needed.
Explore Long-Term Bathroom and Wetroom Solutions
Once your bathroom floor has dried, it’s worth thinking about whether the space is still working as it should. Recurring leaks, poor drainage, damaged flooring or ageing seals can all be signs that your bathroom may need more than a short-term fix.
CCL Wetrooms supports homeowners, architects, developers and contractors with practical wetroom solutions for timber and solid floors designed to manage water safely and effectively. From waterproofing systems and drainage products to complete wetroom installations, we can help you create a bathroom space that is built for long-term performance.
For more guidance, explore our latest bathroom advice on the CCL Wetrooms blog, learn more about our wetroom solutions, or discover how professional installation and waterproofing can help reduce the risk of future water damage.
How to Dry Out a Bathroom Floor After a Leak FAQs
Still have more questions? Find out everything you need to know about preventing leaks and get answers to some of the most asked questions below.
How do I know if water has gone under my bathroom tiles?
Signs include loose tiles, hollow sounds, cracked grout, musty smells, staining below the bathroom or mould returning after cleaning. A moisture meter, thermal imaging survey or professional inspection may be needed to confirm whether hidden damp remains.
Will a dehumidifier dry water under bathroom tiles?
A dehumidifier can help dry the room and reduce surface moisture, but it may not fully dry water trapped beneath tiles, adhesive, screed or waterproofing layers. If the floor still feels damp or smells musty, it should be checked professionally.
How long should I run a dehumidifier after a bathroom leak?
For a small leak, you may need to run a dehumidifier continuously for at least 24 to 48 hours, depending on the extent of the leak and room conditions. Larger leaks may need several days of drying, especially if moisture has reached flooring, walls or the subfloor.
Can a bathroom leak cause mould?
Yes, a bathroom leak can cause mould if moisture remains in flooring, grout, timber, plasterboard or hidden spaces. Fast drying, good ventilation and proper repairs can help reduce the risk.
Should I claim on insurance for a bathroom leak?
It depends on the extent of the damage and your policy.
Take photos, keep records and contact your insurer if the leak has affected flooring, ceilings, walls, fixtures or the structure of your home.